
Dave Miller – Tech Enthusiast & Security Expert – February 21st, 2023

Many current users are still new to Windows 11 as it is the most recent version, and you may have installed several applications; However, what if you want to remove them and that is why in this article, of the many apps, I’ll explain how to uninstall Spotify on Windows 11 safely and correctly.
Installing and uninstalling programs on Windows 11 is quite similar to doing so on Windows 10, although it might be perplexing if you’re using the new interface. To remove the correct files for any software, you must be careful in this area.
You might already have installed Spotify since it’s simple to use and runs well on all platforms, including iOS, Windows, and Android. It’s also incredibly simple to install using the on-screen instructions. Nevertheless, removing can necessitate additional steps since you might just wish to remove the installation folder’s data. Hence, all you need to do to securely and effectively uninstall Spotify is adhere to the straightforward instructions I will provide in this article.
Continue reading the post to learn how to remove it from Windows 11 and other devices. I’ll review more details about Spotify that you might not know yet.
You must have used or at least heard of the Spotify app at least once. Even if you haven’t heard of it, let me introduce you to Spotify, a well-known music track, podcast, and video service that allows you access to millions of songs and other works from authors across the globe. Whether you want to use it on your Windows, iOS, or Android devices, Spotify has become a go-to service for many people worldwide as a home to music and podcasts.
So, it’s understandable why they have gathered a staggering 456 million active members worldwide as of early 2022, which is steadily increasing. Spotify Technology’s revenue for the year ending in 2022 was $12.356B, an increase of 8.02% from the previous year.
The major reason why so many people use Spotify is that the most basic features, like playing music, are completely free. But premium choices are also available if you want to improve your experience further. Similarly, you can pay a regular fee to upgrade to Spotify Premium. You can use your phone, speaker, and other devices to listen without restrictions. They offer everything you would want to buy for your music therapy, with packages spanning from students, individuals, and families, as I will describe later in any post.
As Spotify only provides access to music and podcasts through their applications, all these functionalities are unavailable without installation. It is because there is no option to export their music content from the app because of their license. Hence, if you have already installed Spotify on your copy of Windows 11 and are unsure of how to uninstall Spotify on Windows 11 safely and correctly, read on to the following section. Remember that several methods exist for removing applications and programs, so we’ll review each below.
The principal upgrade to Microsoft’s Windows NT operating system at the time was Windows 10. However, on October 4, 2021, Microsoft formally unveiled Windows 11, which is well worth the download for most users due to its abundance of new features, speed enhancements, and aesthetic updates. Most people have already upgraded to Windows 11 for free if they are using a current version of Windows 10 on a computer that meets the minimal hardware requirements.
Although Spotify is accessible on Windows, as I said before, use the removal instructions below if you already have it installed.
Bonus Tip: Remember that Spotify is bundled with Windows’ UWP app “bloatware” if you’re trying to install it through the Installer. Remove the local UWP binaries before installing the desktop version so that the desktop installer won’t force you to use the UWP app version.
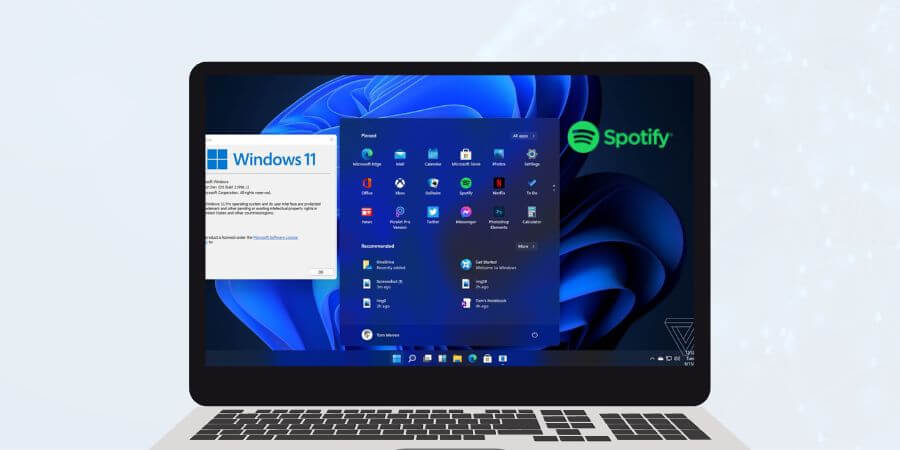
Window 11 includes a customizable start menu, much like every other version of Windows. It is essentially your device’s library search tool and contains all the programs that get currently loaded on your system.
You may perform any of the following to access Windows 11’s Start menu, which houses your programs, settings, and files. Choose the Start icon from the center or left of the taskbar, press the Windows logo key on your keyboard, or, on touch displays, swipe up from the bottom center or left of the screen.
Note: Where the taskbar is situated depends on your taskbar settings, you can change the setting according to your convenience
Note: If an app you downloaded gets installed incorrectly, you could try to repair it, but it won’t appear in your app list or when you search. If you still can’t find the app you were looking for, your antivirus program or an upcoming Windows update is likely preventing you from installing it. In this case, you can temporarily disable your antivirus program while attempting to install the app again. Just be sure to activate Real-time protection after the installation is complete.
Another tool in Microsoft Windows that enables users to manage and delete applications from their computer is Add or Remove Programs. It gets mainly used in place of the control panel, which is still present but is an outdated Windows settings window.
Microsoft’s Control Panel is a dated feature that customers have long used. Changes to Windows settings may get made through the Control Panel, which affects almost every aspect of how Windows functions and appears. Also, you may use them to customize Windows so that it works best for you.
Note: Control Panel is an old administrative tool, but Windows 11 keeps it around because of its backward compatibility options—users still like using it because of this and because numerous settings are accessible through it quickly.
But for the time being, we won’t be concerned with that; instead, we’ll use the control panel to how to uninstall Spotify on Windows 11 safely and correctly
Microsoft’s PowerShell is a cross-platform tool for managing settings and automating tasks. Its task automation solution works with Windows 11, consisting of a command-line shell and the related scripting language.
People frequently mistake PowerShell for cmd. However, PowerShell is a more sophisticated version of cmd that includes a scripting language and an interface for doing administrative tasks more quickly. PowerShell’s ability to get extended has created an ecosystem of PowerShell modules that can deploy and administer practically any technology you need.
Bonus info: PowerShell was first released back in 2006 and has been in continuous use ever since. It got built on top of the .NET framework. Strangely, you can use PowerShell to remove your built-in apps.
Our primary objective is to uninstall Spotify on Windows 11 securely and correctly. Therefore, we won’t dive into those intricate intricacies. Hence, adhere to the guidelines below.
Step#1: Run PowerShell as an administrator by typing “PowerShell” into the Start menu search box.
Step#2: Type the following command on Windows after the PowerShell has opened:
Get-AppxPackage
By right-clicking in the PowerShell title bar and choosing Edit > Find, you may choose the Spotify app from all the currently loaded on your computer.
Step#3: When the Spotify app gets highlighted, type “Spotify” into the Find what field in the Find dialogue box and click the “Close” button.
Step#4: To continue uninstalling, select the text next to PackageFullName in the PowerShell window and type the following command.
Remove-AppxPackage App Name
As an alternative, you may use the command below to skip extra stages.
Get-AppxPackage *Spotify* | Remove-AppxPackage
Nowadays, many apps come with software uninstallers that make it quick and straightforward to erase all files related to programs you wish to uninstall. Although Windows’ built-in uninstaller is adequate, there are occasions when it is fundamental and frequently unable to entirely remove a program without leaving behind several remnants.
If you do it that way, you must remove the files manually. Still, if you use a third-party uninstaller, you can remove the additional files altogether without doing these extra steps. Some uninstaller software even gets better and adds new features. At the same time, it keeps track of the installation process to guarantee a thorough removal when you’re ready. Two of the popular uninstallers that are now on the market and that I personally utilized are listed below.
The best PC cleaner, CCleaner safeguards your privacy while enhancing the speed and security of your computer. It got created by Piriform Software and is a tool designed to remove faulty Windows Registry entries and possibly undesirable items from a computer.
Of all the other capabilities, CCleaner makes uninstalling programs the easiest. It functions similarly to how your operating system itself uninstalls apps. Still, it has some extra capabilities and is accessible under CCleaner’s Tools section. Here, you will see a complete list of the programs from which you may choose the one you wish to uninstall. To follow the installation process, go to the official website.
It is an excellent application that got created especially for removing apps, speeding up your computer, and safeguarding your privacy. With Advanced Uninstaller PRO Free, you can uninstall any program and use sophisticated options for virus detection or application remnant cleanup. You may also follow the instructions on the official website.
When Advanced Uninstaller PRO gets installed on your computer, it takes good care of the Windows registry and services to ensure your PC runs as quickly as possible. It may let you permanently remove any file and wipe surfing history in addition to monitoring installations.
If you want to listen to music while on the go and have access to all the musicians, Spotify is a terrific app.
Yet, if you start using it on a Computer, the experience is just as amazing.
Today’s topic of discussion was how to uninstall Spotify on Windows 11 safely and correctly so that you may get rid of the software.
You may choose from various ways to accomplish this based on which suits you best. The standard uninstalls procedure using built-in software is straightforward to follow. Still, if you think about utilizing the extra program, you should be good to go with the choices I just gave you.
If you don’t want to put yourself in a challenging scenario where you could have to remove any program files that could cause an issue for your OS, these third-party softwares are better to employ.
**Onlinecloudsecurity.com is a participant in the Amazon Services LLC Associates Program, an affiliate advertising program designed to provide a way for websites to earn advertising revenues by advertising and linking to Amazon.com and affiliated sites. As an Amazon Associate we earn affiliate commissions from qualifying purchases.**

Dave Miller is an IT Consultant for Online Cloud Security and has over 7 years of experience in the Information Technology space. He also specializes in repairing laptops & computers. In his spare time, he loves to talk about new technologies and hosts monthly IT and Cyber Security meetings in the Houston area.
Click any button down below to share this article on the following channels:
Online Cloud Security is here to recommend you the most secure devices, from laptops to smartphones, we only want to provide you with products that we have tested and used ourselves for online security. Every product that we recommend is heavily inspected and tested for security against hackers, viruses, malware, and any other intruders that may want to steal your information.


Online Cloud Security is here to recommend you the most secure devices, from laptops to smartphones, we only want to provide you with products that we have tested and used ourselves for online security. Every product that we recommend is heavily inspected and tested for security against hackers, viruses, malware, and any other intruders that may want to steal your information.
Your Trusted Source for Online Security
