Windows 10 or 11 Computer Freezes Every Few Seconds - HOW TO FIX THIS
Dave Miller – Tech Enthusiast & Security Expert – January 10th, 2022
Micro stutters, often known as short freezes, can be extremely frustrating. They are most common in Windows and can be caused by a variety of factors. The causes are numerous and unaffected by factors like as computer speed, storage type (SSD or HDD), cooling method (air or water), or processor type. However, if your Windows 10 or 11 computer freezes every few seconds, you can try the solutions in this guide to see if they work.
Hardware, software, operating system, temperature, or something else entirely might cause micro stutters or complete screen freezes that last every 3 seconds. The first step is to determine if the stuttering occurs when you’re doing a certain task on a computer or if it is truly random. If it happens when you’re completing a specific task, you know where to begin searching. If it’s random, we’ll have to look deeper. Windows 10 has been freezing more frequently than usual since October of last year.
It is unfortunate that these freezes happen so frequently and without any relevant information. In addition to being incredibly frustrating, this also makes it much more difficult to diagnose the issue.
The good news is that it is repairable.
Table of Contents
1st Step to Figuring Out Why Your Windows 10 or 11 Computer Keeps Freezing Every Few Seconds
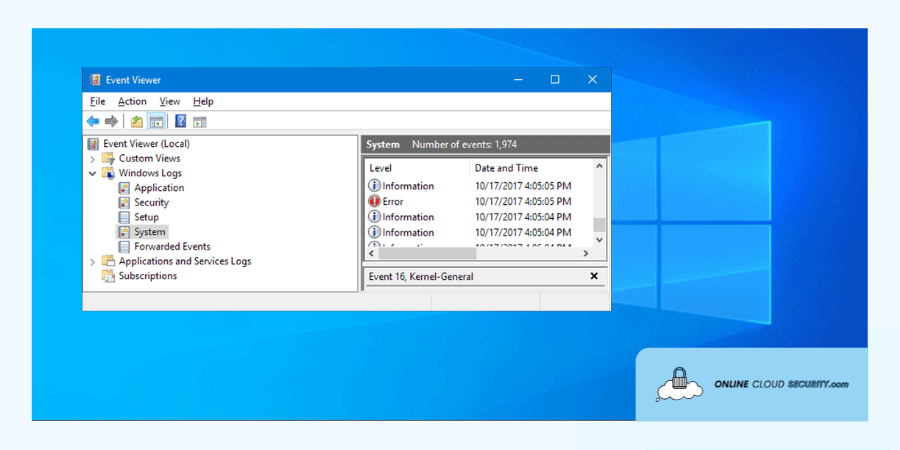
If your Windows 10 or 11 computer keeps freezing every few seconds, you should first check the Windows Event Viewer for system issues. Using this information, we could discover what’s causing your issues immediately.
Open the Event Viewer by typing ‘event’ into the Windows search box.
Event Viewer can be opened by selecting Windows Logs from the left menu and then System from the right.
Troubleshoot any red or yellow alerts that appear on a regular basis.
Your Windows 10 or 11 computer freezing every few seconds isn’t normally caused by yellow warnings, but if you don’t have any reds, you might want to have a look at some of those. A complete list of errors isn’t possible on this page. Instead of wasting time trying to guess the error number, look it up on Google or another search engine.
Check Your Hard Drives
Micro stuttering is frequently caused by hard drives, particularly if you’re still using an HDD. Using a free program called CrystalDiskInfo, we can monitor their health. Make sure you download it and let it run a scan of your drives. As a warning sign of impending failure, excessive errors could also indicate the need for an in-depth format.
Consider making a backup of your data and then reformatting the drive if you discover issues.
Right-click the drive in Windows Explorer, pick Properties, Tools, and then select Error Checking if it’s a Windows drive.
Let the utility run a diagnostic on the drive and address any problems it finds. In the meantime, don’t worry about the SFC/Scannow process.
Install The Most Recent Version Of Driver Software on Your Windows 10 or 11 Computer
Make sure that all of your drivers are up to current. Make sure your graphics drivers, audio drivers, printer, peripherals, and especially your motherboard drivers are all up to date. Device Manager or the manufacturer’s website can be used to get the necessary drivers for your system. It’s typical for Windows to stutter because of outdated or faulty drivers, so it’s a good idea to update them all. Even if there is no latest driver for your audio or motherboard, it is always recommended obtaining and updating it from the manufacturer.
The vast majority of graphics drivers have the ability to override previous versions. It is best to use DDU to delete an old driver before installing a new one. The application is free to use, and I use it every time I need to debug or reinstall a graphics driver.
Check Windows For Errors
System File Checkeris an alternative that you may want to consider. Automatically repairs issues that are found in your Windows installation. It is possible to use this utility to verify that Windows has no faults after checking your hard disks first.
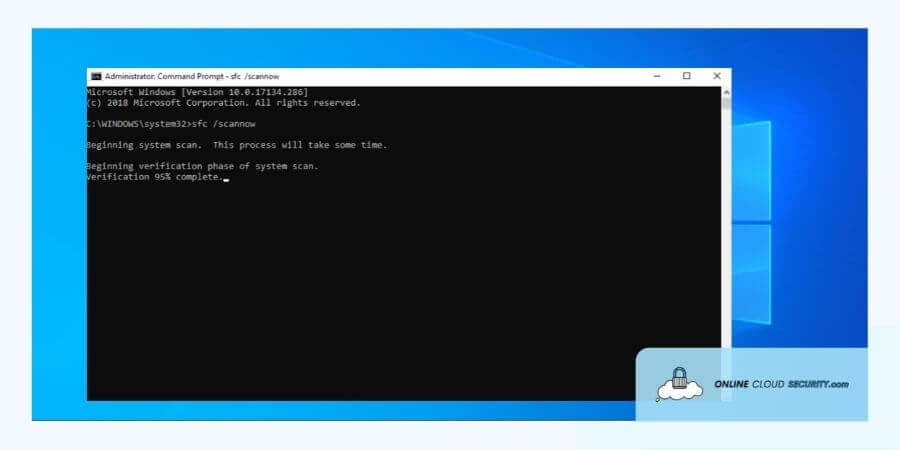
Open Command Prompt by selecting it from the Start menu of Windows (Admin).
To begin scanning, enter the command “sfc /scannow” and press Enter. Please wait till the check is done.
In the search box, enter the command ‘dism online cleanup restore health.’
As the SFC checks progresses, you will be able to observe a progress meter. The tool will immediately remedy any faults it identifies and will explain what happened next. Wait for it to complete before typing DISM. Deployment Image Servicing and Management will run additional checks on Windows, including Windows Store and Windows Update, to see if there are any issues present.
Update Windows
Some micro stuttering was also caused by Microsoft’s solutions for the Meltdown and Spectre vulnerabilities. My HP Envy x360 i7 system slowed to a crawl with micro stutter after installing these patches, as did the majority of computers. It worked for me, and it might work for you if you upgrade to the latest Windows 10 or Windows 11 version.
Update now by clicking the Windows 10 Update link.
Install the update by letting Windows download and install it.
Only do this if you have the patience to sit about for an hour. Select Download Tool Now if the update doesn’t work on the page. In order to make USB installation discs for a second computer, use this software program. The USB stick you use to install it on must be at least 12GB in size, and you will need to do a clean Windows installation thereafter. First, make sure you have a copy of all your data. If it doesn’t work, the second most likely culprit is a lack of RAM.
Check Your Windows 10/11 RAM
As the gatekeeper to everything your computer’s processes can view, system RAM is an essential part of your computer’s architecture. Micro stuttering can be caused by timing or memory difficulties. For RAM testing, I employ MemTest86+. It is far superior to the Windows Memory Diagnostic Tool when it comes to spotting problems. For this to work, you’ll need a blank USB disk.
**Onlinecloudsecurity.com is a participant in the Amazon Services LLC Associates Program, an affiliate advertising program designed to provide a way for websites to earn advertising revenues by advertising and linking to Amazon.com and affiliated sites. As an Amazon Associate we earn affiliate commissions from qualifying purchases.**
Dave Miller
IT Consultant at Online Cloud Security
Dave Miller is an IT Consultant for Online Cloud Security and has over 7 years of experience in the Information Technology space. He also specializes in repairing laptops & computers. In his spare time, he loves to talk about new technologies and hosts monthly IT and Cyber Security meetings in the Houston area.
Click any button down below to share this article on the following channels:
Facebook
Twitter
Pinterest
Email
About Online Cloud Security:
Online Cloud Security is here to recommend you the most secure devices, from laptops to smartphones, we only want to provide you with products that we have tested and used ourselves for online security. Every product that we recommend is heavily inspected and tested for security against hackers, viruses, malware, and any other intruders that may want to steal your information.
Online Cloud Security is here to recommend you the most secure devices, from laptops to smartphones, we only want to provide you with products that we have tested and used ourselves for online security. Every product that we recommend is heavily inspected and tested for security against hackers, viruses, malware, and any other intruders that may want to steal your information.